tvOS is the operating system, developed by Apple, for their TV line of hardware. It was first introduced in September 2015 when Apple released the 4th generation Apple TV to the consumer. tvOS is based on iOS, so it inherits many iOS amazing features and technology such as UIKit, Accessiblity, Voice Over, and Siri. Apple TV bundled the Siri Remote to users, it has built in touchpad for the user to navigate around the UI in operating system. It provides focus on content, so users can receive feedback on the item that is currently being selected on the screen. It also has a menu button for users to navigate back to previous screen. Apple also provides on screen remote for users to navigate using an iOS device.
The first version of tvOS released to the user in 2015 was tvOS 9.0. As of March 25 2019, the latest version of tvOS is 12.2. It has supports for HDR10, Dolby Vision to deliver more color to the supported television. Dolby Atmos is also supported for 4K Apple TV hardware. Users can also trigger “Hey siri play me a content on my apple tv” to play the content on their Apple TV using their iOS device.
With recent announcement of Apple TV Plus service at 2019 Apple Show Time Event, Apple finally provided their own streaming TV service and bundling all their partner third party video apps like HBO into one Apple TV app and add on paid subscriptions without the users have to move between apps. The Apple TV looks really promising for consumers to have the entertainment experience inside their living room.
Apple provides developers withe several ways or frameworks for them when they want to develop a tvOS app:
- Using frameworks like UIKit to create app and Metal to create games similiar to iOS. This gives developer the maximum flexibility and customizability, we can also seamlessly use our experiences and knowledge on building iOS app to tvOS.
- For app that displays catalog of media for streaming purposes, developer can use TVMLKit templates with XML and Javascript so users can use predefined layouts and JS API.
So without furher ado, let’s move on and start building the insanely great apps for tvOS.
What we will build
In this tutorial article, we will build a Movie Database app using The Movie Database (TMDb) API and TVUIKit. Before we can make a request using the API, the very first thing we have to do is to register and get our API Key from themoviedb.org.
We will build a great movie app. Here are the main features of the app that we will build:
- List of movies by now playing, top rated, popular, upcoming.
- Display overview and metadata of a movie.
- Watch movie trailers.
- Search movies.

Exploring the Starter Project
To begin the project, you can clone or download the starter project in the GitHub repository link below.
tvOSMovieDatabase Starter Project
The starter project provides several classes to help you build the app:
MovieStore: is a concrete implementation ofMovieServiceinterface that provides method to retrieve list ofmoviesusing theendpointenum, retrieve a singlemovieusing the id, search movies using thequerypassed. Theendpointprovides several cases such as :now playing,upcoming,top rated,popular. It uses theURLSessiondata task to retrieve the data from the The Movie DB endpointurl, then decode to theCodable Swift ModelusingJSONDecoder.123456789101112131415161718192021222324252627282930313233343536373839404142434445464748495051525354555657585960616263646566676869707172737475767778798081828384858687888990919293949596979899100101102103104105106107108109110111112113114115116117118119120121122123124125126127128129130131132133134135136137138139140141142143144145146147148149150151152153154155156157158159public class MovieStore: MovieService {public static let shared = MovieStore()private init() {}private let apiKey = "INSERT_API_KEY_HERE"private let baseAPIURL = "https://api.themoviedb.org/3"private let urlSession = URLSession.sharedprivate let jsonDecoder: JSONDecoder = {let jsonDecoder = JSONDecoder()jsonDecoder.keyDecodingStrategy = .convertFromSnakeCaselet dateFormatter = DateFormatter()dateFormatter.dateFormat = "yyyy-mm-dd"jsonDecoder.dateDecodingStrategy = .formatted(dateFormatter)return jsonDecoder}()public func fetchMovies(from endpoint: Endpoint, params: [String: String]? = nil, successHandler: @escaping (_ response: MoviesResponse) -> Void, errorHandler: @escaping(_ error: Error) -> Void) {guard var urlComponents = URLComponents(string: "\(baseAPIURL)/movie/\(endpoint.rawValue)") else {errorHandler(MovieError.invalidEndpoint)return}var queryItems = [URLQueryItem(name: "api_key", value: apiKey)]if let params = params {queryItems.append(contentsOf: params.map { URLQueryItem(name: $0.key, value: $0.value) })}urlComponents.queryItems = queryItemsguard let url = urlComponents.url else {errorHandler(MovieError.invalidEndpoint)return}urlSession.dataTask(with: url) { (data, response, error) inif error != nil {self.handleError(errorHandler: errorHandler, error: MovieError.apiError)return}guard let httpResponse = response as? HTTPURLResponse, 200..<300 ~= httpResponse.statusCode else {self.handleError(errorHandler: errorHandler, error: MovieError.invalidResponse)return}guard let data = data else {self.handleError(errorHandler: errorHandler, error: MovieError.noData)return}do {let moviesResponse = try self.jsonDecoder.decode(MoviesResponse.self, from: data)DispatchQueue.main.async {successHandler(moviesResponse)}} catch {self.handleError(errorHandler: errorHandler, error: MovieError.serializationError)}}.resume()}public func fetchMovie(id: Int, successHandler: @escaping (_ response: Movie) -> Void, errorHandler: @escaping(_ error: Error) -> Void) {guard let url = URL(string: "\(baseAPIURL)/movie/\(id)?api_key=\(apiKey)&append_to_response=videos,credits") else {handleError(errorHandler: errorHandler, error: MovieError.invalidEndpoint)return}urlSession.dataTask(with: url) { (data, response, error) inif error != nil {self.handleError(errorHandler: errorHandler, error: MovieError.apiError)return}guard let httpResponse = response as? HTTPURLResponse, 200..<300 ~= httpResponse.statusCode else {self.handleError(errorHandler: errorHandler, error: MovieError.invalidResponse)return}guard let data = data else {self.handleError(errorHandler: errorHandler, error: MovieError.noData)return}do {let movie = try self.jsonDecoder.decode(Movie.self, from: data)DispatchQueue.main.async {successHandler(movie)}} catch {self.handleError(errorHandler: errorHandler, error: MovieError.serializationError)}}.resume()}func searchMovie(query: String, params: [String : String]?, successHandler: @escaping (MoviesResponse) -> Void, errorHandler: @escaping (Error) -> Void) {guard var urlComponents = URLComponents(string: "\(baseAPIURL)/search/movie") else {errorHandler(MovieError.invalidEndpoint)return}var queryItems = [URLQueryItem(name: "api_key", value: apiKey),URLQueryItem(name: "language", value: "en-US"),URLQueryItem(name: "include_adult", value: "false"),URLQueryItem(name: "region", value: "US"),URLQueryItem(name: "query", value: query)]if let params = params {queryItems.append(contentsOf: params.map { URLQueryItem(name: $0.key, value: $0.value) })}urlComponents.queryItems = queryItemsguard let url = urlComponents.url else {errorHandler(MovieError.invalidEndpoint)return}urlSession.dataTask(with: url) { (data, response, error) inif error != nil {self.handleError(errorHandler: errorHandler, error: MovieError.apiError)return}guard let httpResponse = response as? HTTPURLResponse, 200..<300 ~= httpResponse.statusCode else {self.handleError(errorHandler: errorHandler, error: MovieError.invalidResponse)return}guard let data = data else {self.handleError(errorHandler: errorHandler, error: MovieError.noData)return}do {let moviesResponse = try self.jsonDecoder.decode(MoviesResponse.self, from: data)DispatchQueue.main.async {successHandler(moviesResponse)}} catch {self.handleError(errorHandler: errorHandler, error: MovieError.serializationError)}}.resume()}private func handleError(errorHandler: @escaping(_ error: Error) -> Void, error: Error) {DispatchQueue.main.async {errorHandler(error)}}}Movie.swift: This file stores the model of our app. It usescodableprotocol to map theJSONresponse from the API to theSwift Models.123456789101112131415161718192021222324252627282930313233343536373839404142434445464748495051525354555657585960616263646566676869707172737475767778798081828384public struct MoviesResponse: Codable {public let page: Intpublic let totalResults: Intpublic let totalPages: Intpublic let results: [Movie]}public struct Movie: Codable {public let id: Intpublic let title: Stringpublic let backdropPath: String?public let posterPath: String?public let overview: Stringpublic let releaseDate: Datepublic let voteAverage: Doublepublic let voteCount: Intpublic let tagline: String?public let genres: [MovieGenre]?public let videos: MovieVideoResponse?public let credits: MovieCreditResponse?public let adult: Boolpublic let runtime: Int?public var posterURL: URL {return URL(string: "https://image.tmdb.org/t/p/w500\(posterPath ?? "")")!}public var backdropURL: URL {return URL(string: "https://image.tmdb.org/t/p/original\(backdropPath ?? "")")!}public var voteAveragePercentText: String {return "\(Int(voteAverage * 10))%"}public var ratingText: String {let rating = Int(voteAverage)let ratingText = (0..<rating).reduce("") { (acc, _) -> String inreturn acc + "⭐️"}return ratingText}}public struct MovieGenre: Codable {let name: String}public struct MovieVideoResponse: Codable {public let results: [MovieVideo]}public struct MovieVideo: Codable {public let id: Stringpublic let key: Stringpublic let name: Stringpublic let site: Stringpublic let size: Intpublic let type: Stringpublic var youtubeURL: URL? {guard site == "YouTube" else {return nil}return URL(string: "https://www.youtube.com/watch?v=\(key)")}}public struct MovieCreditResponse: Codable {public let cast: [MovieCast]public let crew: [MovieCrew]}public struct MovieCast: Codable {public let character: Stringpublic let name: String}public struct MovieCrew: Codable {public let id: Intpublic let department: Stringpublic let job: Stringpublic let name: String}- There is one
MovieDetailCell.swiftfile which is a customUITableViewCellto display metadata of a movie. We will use this later when building theMovie Detail Screen. - We also use several
cocoapodslibrary to help us building our app faster.Kingfisheris used to download and cache image for themovieposter, whileXCDYouTubeKitis used convertyoutube video idto a video linkurlthat we can pass toAVPlayerVideoControllerto watch the trailers.tvOSdoesn’t allow us to embedWKWebViewinside our app.1234567target 'MovieDBTV' douse_frameworks!pod 'Kingfisher'pod 'XCDYouTubeKit'end
Before you continue to build the app, please make sure to open MovieStore.swift file and paste your API key into the apiKey constant in the MovieStore class.
|
1 2 3 4 5 |
public class MovieStore: MovieService { ... private let apiKey = "INSERT_API_KEY_HERE" ... } |
At last, make sure to run pod install to install all the Cocoapod dependencies. It’ll take some time for the installation but it’s an essential step.
Building Movie List Screen
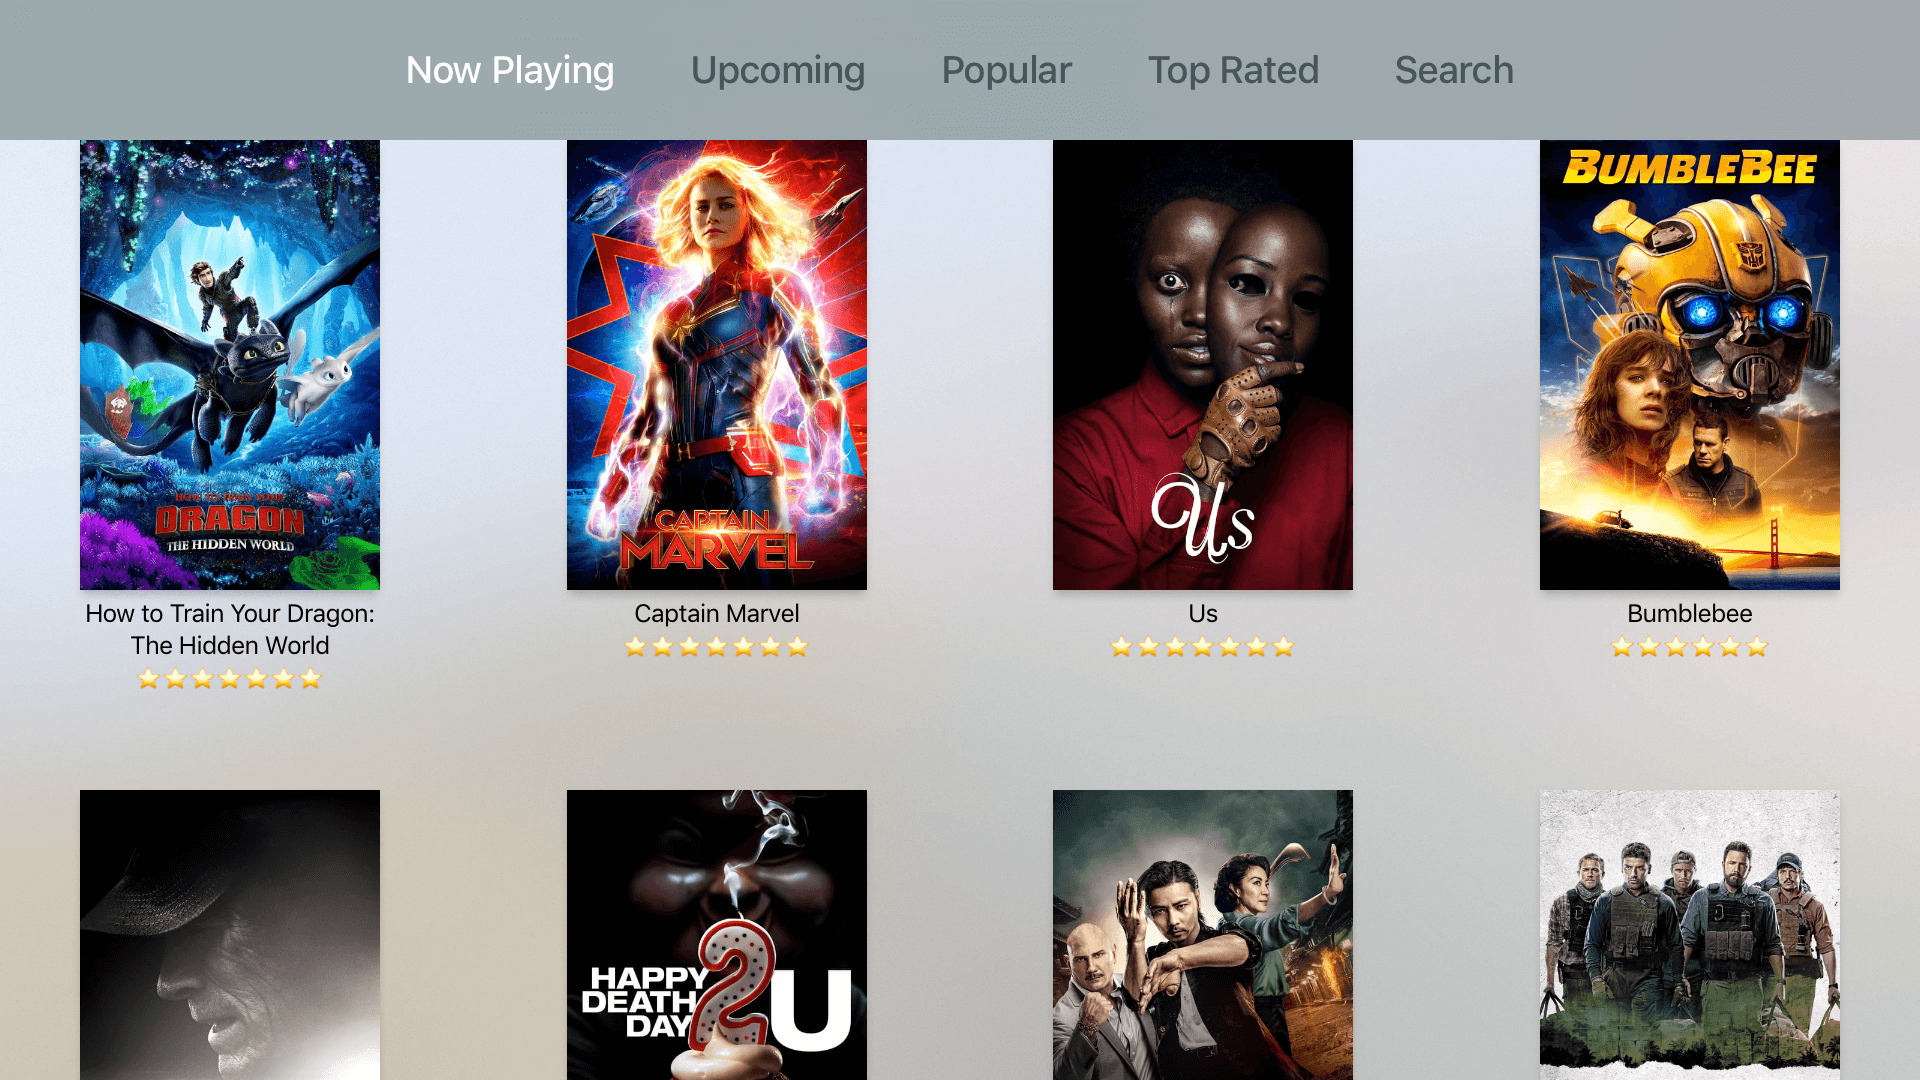
The first screen that we will build is the Movie List Screen. The screen consists of several components such as:
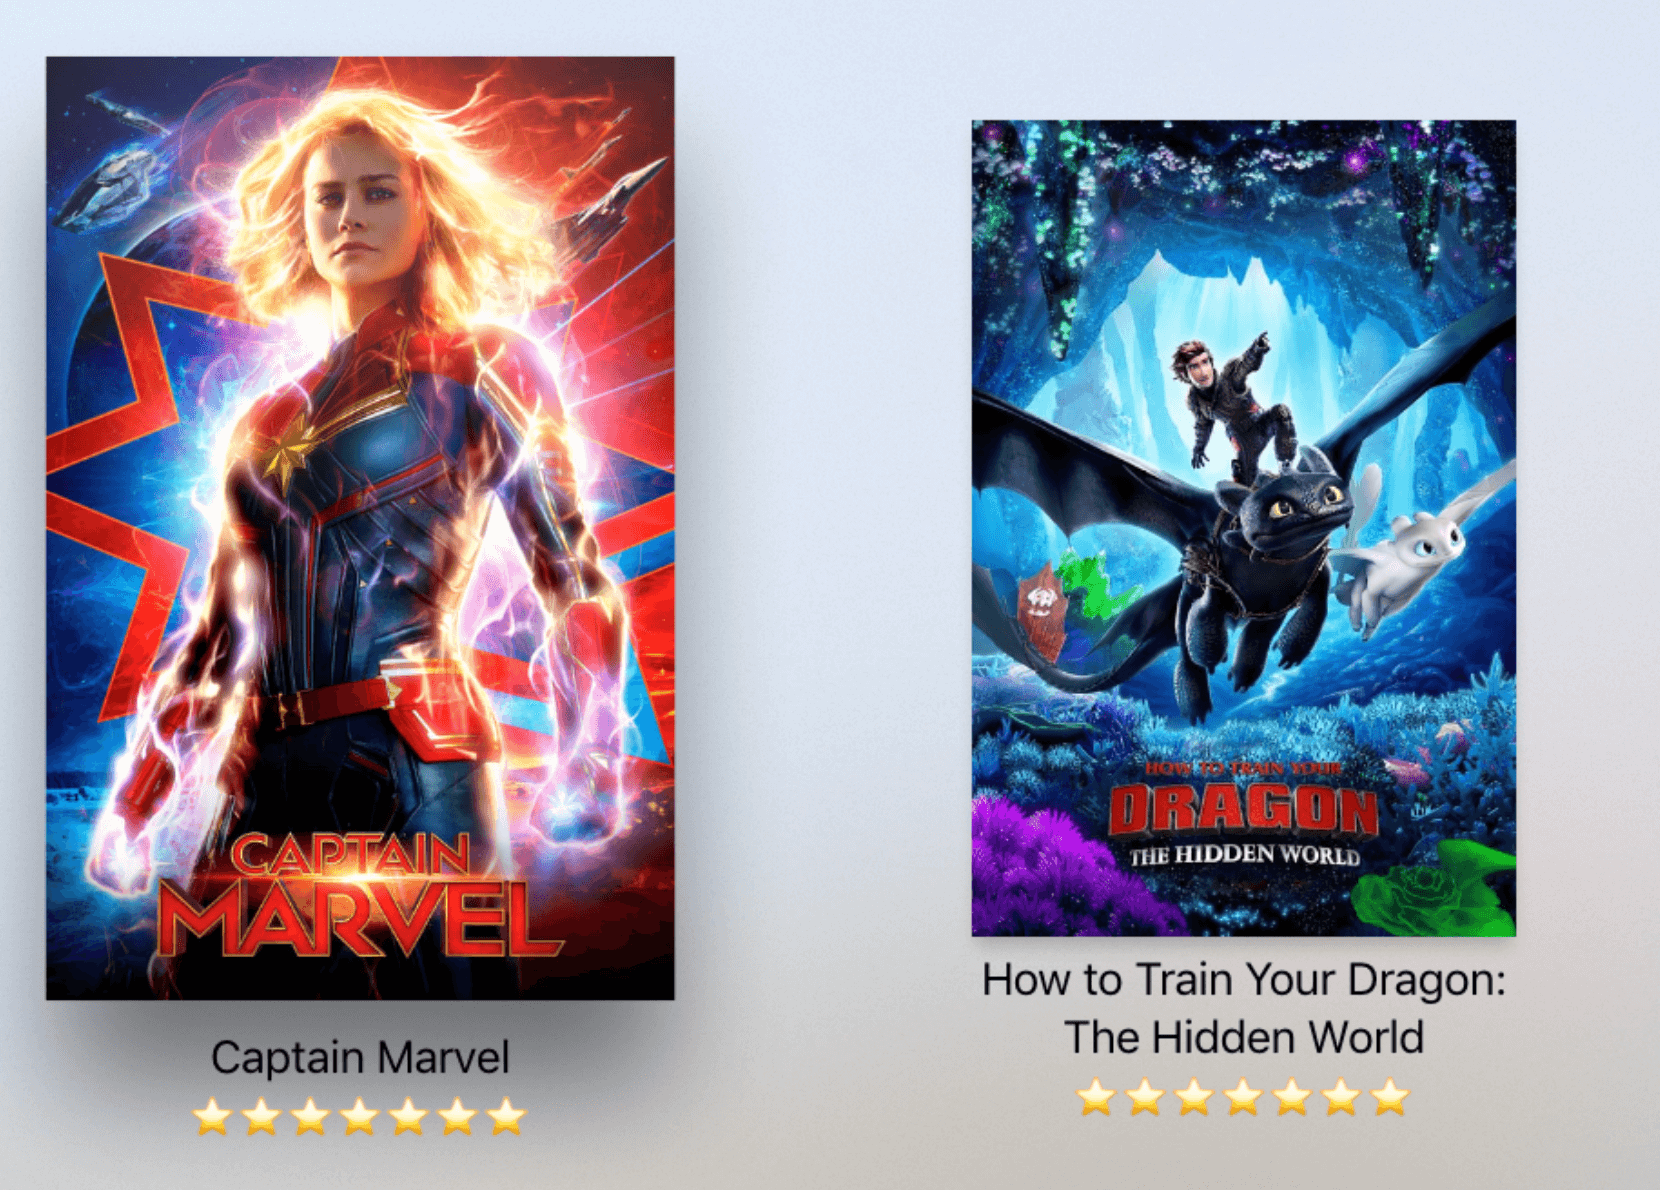
- It used Collection View with vertical flow layout to display grid of movies with the respective poster image, title, and rating stars in each cell.
- The
MovieListViewControlleris embedded into Tab Bar Controller . Each category will be represented by theMovieListViewControllerwith different endpoint so it can request movies associated with the category to the API. - The
MovieCellis the Collection View Cell that will be used by the Collection View to display the movie. When a user navigates using the touchpad of the Siri Remote. The focused cell poster image will be highlighted and elevated to provide feedback to user.
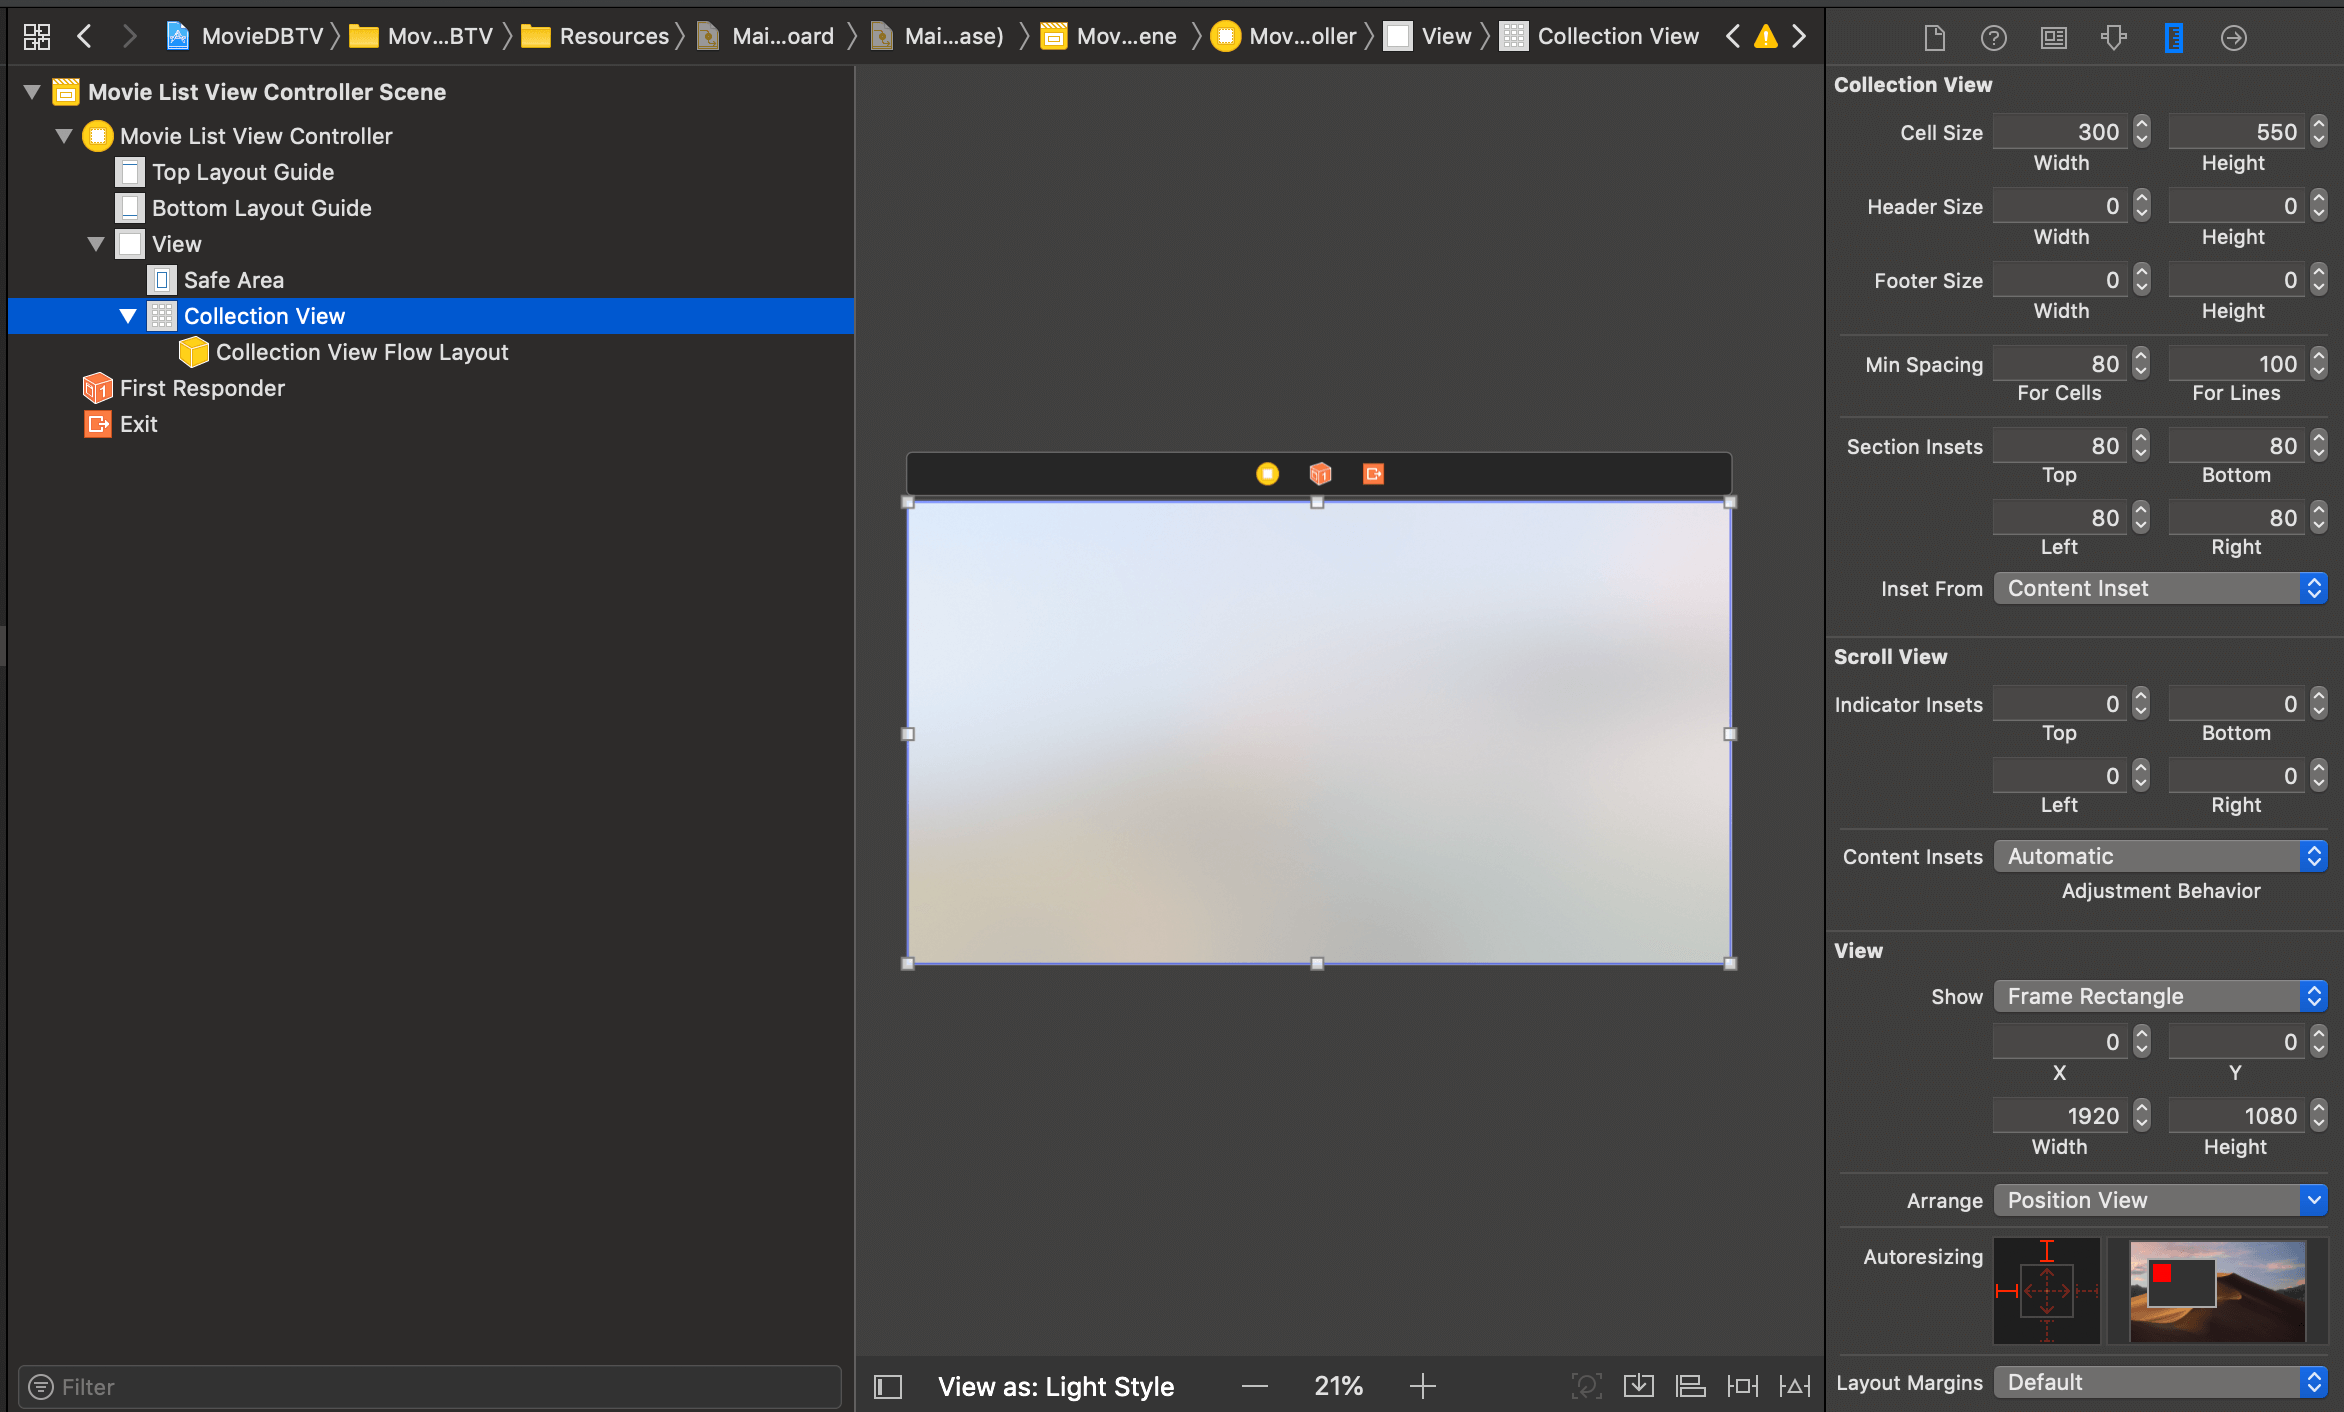
Let’s start by creating a new file named MovieListViewController.swift. Inside the file, we declare the MovieListViewController class as a subclass of UIViewController. Next, let’s move on to Main.storyboard and drag a View Controller from object library. Set the View Controller class and Storyboard ID as MovieListViewController in identity inspector. Drag a Collection View into the MovieListViewController. While selecting the collection view, navigate to size inspector and set the following properties:
- Cell Size Width: 300, Cell Size Height: 550
- Min Spacing For Cells: 80, Min Spacing For Lines: 100
- Section Insets Top, Bottom, Left, Right: 80
- X: 0, Y: 0, Width: 1920, Height: 1080
- Set the
Collection Viewdatasource and delegate toMovieListViewController.
Next, we need some UI elements, to represent the loading of data from the backend and error if the request fails. To do this we will add several views:
- Drag an
Activity Indicator View. Set the Auto Layout constrainstAlign Center X to Superview,Align Center Y to Superview. Also in Attribute Inspector, set the style toLarge White, color toBlack Color, and check theHides when Stoppedcheckbox. - Drag an
UILabelto theView Controller. Set the Auto Layout constraintsAlign Center X to Superview,Align Center Y to Superview. - Drag an
UIButtonto theView Controller. Set the Auto Layout constraintsAlign Center X to Label,Vertical Top Space to Label = 20.
Open MovieListViewController.swift and declare the required @IBOutlet properties below:
|
1 2 3 4 5 6 7 8 9 10 11 12 13 14 15 16 17 18 19 20 21 22 23 |
class MovieListViewController: UIViewController { @IBOutlet var collectionView: UICollectionView! @IBOutlet var activityIndicator: UIActivityIndicatorView! @IBOutlet var infoLabel: UILabel! @IBOutlet var refreshButton: UIButton! @IBAction func refreshTapped(_ sender: Any) { // TODO: REFRESH CONTENT from API } } extension MovieListViewController: UICollectionViewDataSource, UICollectionViewDelegateFlowLayout { func collectionView(_ collectionView: UICollectionView, numberOfItemsInSection section: Int) -> Int { return 0 } func collectionView(_ collectionView: UICollectionView, cellForItemAt indexPath: IndexPath) -> UICollectionViewCell { // TODO: Dequeque Movie Cell and configure fatalError() } } |
Connect them to the associated views in storyboard. Also, please make sure to connect the @IBAction to the refresh button .
Creating the Movie Cell
Next, let’s create a new Cocoa Touch Class file called the MovieCell , it will be a subclass of UICollectionViewCell. Please make sure to check the Also create XIB file checkbox to create nib file for the cell. Open MovieCell.xib file, we are going to add several UI elements for this cell:
- First, select the cell, then navigate to size inspector and set the cell size width to
300and height to550. - Drag a
Image Viewinto the cell, then set its Auto Layout constraints toTop Space to Cell = 20,Leading Space to Cell = 20,Trailing Space to Cell = 20,width = 300, andheight = 450. In identity inspector, make sure sureAdjust on Ancestor Focusis checked andClip to Boundsis unchecked. This image view will be set as focus as user navigates around the items, the image will be floated, enlarged, and elevated around other elements. - Drag a
Labelinto the cell below theImage View, then set its Auto Layout constraints toVertical Top Space to Image View = 8,Trailing Space to Cell = 0,Leading Space to Cell = 0. - Drag a second
Labelinto the cell below the firstLabel, the set its Auto Layout constraints toVertical Top Space to Label = 4,Trailing Space to Cell = 0,Leading Space to Cell = 0.
After you finished, your cell should look like the image below.

Next, let’s open the MovieCell.swift file and declare several properties, as well as, function.
|
1 2 3 4 5 6 7 8 9 10 11 12 13 14 15 16 17 18 19 20 21 22 23 24 25 26 27 28 29 30 31 32 33 34 35 36 37 38 39 40 41 42 43 44 45 46 47 48 49 50 51 52 53 54 |
import UIKit import Kingfisher class MovieCell: UICollectionViewCell { @IBOutlet var imageView: UIImageView! @IBOutlet var titleLabel: UILabel! @IBOutlet var ratingLabel: UILabel! @IBOutlet var unfocusedConstraint: NSLayoutConstraint! var focusedConstraint: NSLayoutConstraint! private let dateFormatter: DateFormatter = { let formatter = DateFormatter() formatter.dateStyle = .long formatter.timeStyle = .none return formatter }() override func awakeFromNib() { super.awakeFromNib() focusedConstraint = titleLabel.topAnchor.constraint(equalTo: imageView.focusedFrameGuide.bottomAnchor, constant: 16) } override func updateConstraints() { super.updateConstraints() focusedConstraint?.isActive = isFocused unfocusedConstraint?.isActive = !isFocused } func configure(_ movie: Movie) { imageView.kf.indicatorType = .activity imageView.kf.setImage(with: movie.posterURL) titleLabel.text = movie.title if movie.ratingText.isEmpty { ratingLabel.text = dateFormatter.string(from: movie.releaseDate) } else { ratingLabel.text = movie.ratingText } } override func didUpdateFocus(in context: UIFocusUpdateContext, with coordinator: UIFocusAnimationCoordinator) { super.didUpdateFocus(in: context, with: coordinator) setNeedsUpdateConstraints() coordinator.addCoordinatedAnimations({ self.layoutIfNeeded() }, completion: nil) } } |
Let me walk you through what we have just implemented in the cell:
- We declare the
IBOutletfor theImage View, 2Labels, and also an auto layout constraint reference from the firstLabel. This will be used later to set the label spacing properly when the cell is receiving focus, so the enlarged image view does not overlap the labels. You need to ensure to connect those outlets properly with the components in the Xib. - The
configure(_ movie:)method will be used to configure the UI with movie passed as the parameter. It usesKingfisherlibrary to retrieve and cache image from the movieurl, the title of the movie is set to thetitleLabeland the formatted rating text is set toratingLabel. If a movie has no rating (unreleased movie), the release of movie will be displayed using theDateFormatter. - In
awakeFromNibmethod, we assign thefocusedConstraintproperty using a constraint fromtitleLabelVertical Top Constraint to Image View Focused Frame Guide Bottom Anchorwith constant of 16. TheFocused Frame Guide Bottom Anchoris theImage Viewbottom anchor when the image view is getting focus. - The
didUpdateFocus(in context:coordinator:)will be invoked when the cell is getting focus or leaving focus. Here, we trigger thesetNeedsUpdateConstraintsmethod to trigger constraint update method, and ask the coordinator to add animations passinglayoutIfNeeded. - In the
updateConstraintsmethod. We set thefocusedConstraintconstraint to active using the cellisFocusedproperty and in reverse set theunfocusedConstraintto true when cell is not being focused.
That’s what the code does. Let’s move on to the next screen.
Building the Movie List View Controller
Here we will build the MovieListViewController to fetch data from TMDb API endpoint, then display the data using the MovieCell that we just created in the Collection View.
Okay, let’s open MovieListViewController.swift and add the following code.
|
1 2 3 4 5 6 7 8 9 10 11 12 13 14 15 16 17 18 19 20 21 22 23 24 25 26 27 28 29 30 31 32 33 34 35 36 37 38 39 40 41 42 43 44 45 46 47 48 49 50 51 52 53 54 55 56 57 58 59 60 61 62 63 64 65 66 67 68 69 70 71 72 |
class MovieListViewController: UIViewController { @IBOutlet var collectionView: UICollectionView! @IBOutlet var activityIndicator: UIActivityIndicatorView! @IBOutlet var infoLabel: UILabel! @IBOutlet var refreshButton: UIButton! var endpoint: Endpoint? var movieService: MovieService = MovieStore.shared var movies = [Movie]() { didSet { collectionView.reloadData() } } override func viewDidLoad() { super.viewDidLoad() collectionView.register(UINib(nibName: "MovieCell", bundle: nil), forCellWithReuseIdentifier: "Cell") fetchMovies() } private func fetchMovies() { guard let endpoint = endpoint else { return } activityIndicator.startAnimating() hideError() movieService.fetchMovies(from: endpoint, params: nil, successHandler: { [unowned self] (response) in self.activityIndicator.stopAnimating() self.movies = response.results }) { [unowned self] (error) in self.activityIndicator.stopAnimating() self.showError(error.localizedDescription) } } private func showError(_ error: String) { infoLabel.text = error infoLabel.isHidden = false refreshButton.isHidden = false } private func hideError() { infoLabel.isHidden = true refreshButton.isHidden = true } @IBAction func refreshTapped(_ sender: Any) { fetchMovies() } } extension MovieListViewController: UICollectionViewDataSource, UICollectionViewDelegateFlowLayout { func collectionView(_ collectionView: UICollectionView, numberOfItemsInSection section: Int) -> Int { return movies.count } func collectionView(_ collectionView: UICollectionView, cellForItemAt indexPath: IndexPath) -> UICollectionViewCell { let cell = collectionView.dequeueReusableCell(withReuseIdentifier: "Cell", for: indexPath) as! MovieCell let movie = movies[indexPath.item] cell.configure(movie) return cell } func collectionView(_ collectionView: UICollectionView, didSelectItemAt indexPath: IndexPath) { // TODO: Present the Movie Detail Screen pasing movie id } } |
Again let’s me explain what we have just implemented:
- The
endpointproperty is the enum case that will be assigned using dependency injection. It will be passed to theMovieServiceto request movies from the TMDb API for the specific category. - The
movieServiceis an instance ofMovieStorethat will be used to fetch movies based on theendpoint. - In the
viewDidLoadmethod, we register theMovieCellxib with an identifier and invoke thefetchMoviesmethod. - The
fetchMoviesmethod starts animating the activity spinner, hide all UI elements related to the error if exists. Then we call thefetchMovies(from:)method. In the success handler, the response result which is the array ofmoviesis assigned to themoviesinstance property in the View Controller. In the error handler, it will invoke theshowErrormethod passing the errorlocalizedDescriptionproperty to display an error message and refresh button. Both of the handlers will stop animating the activity spinner. - In
collectionView(:cellForItemAt indexPath), theMovieCellis dequeued with the reuse identifier. The movie instance is retrieved from the array using the proper row index. Then, we call the cell’sconfiguremethod to configure the cell UI.
Configuring the Tab Bar Controller
We will display a set of Movie List Screen with several categories, such as now playing, popular, top rated, and upcoming. To do this, we will use the Tab Bar Controller and instantiate MovieListViewController using the StoryboardID for each of the endpoint category. We will then set it as the children view controllers of the tab bar.
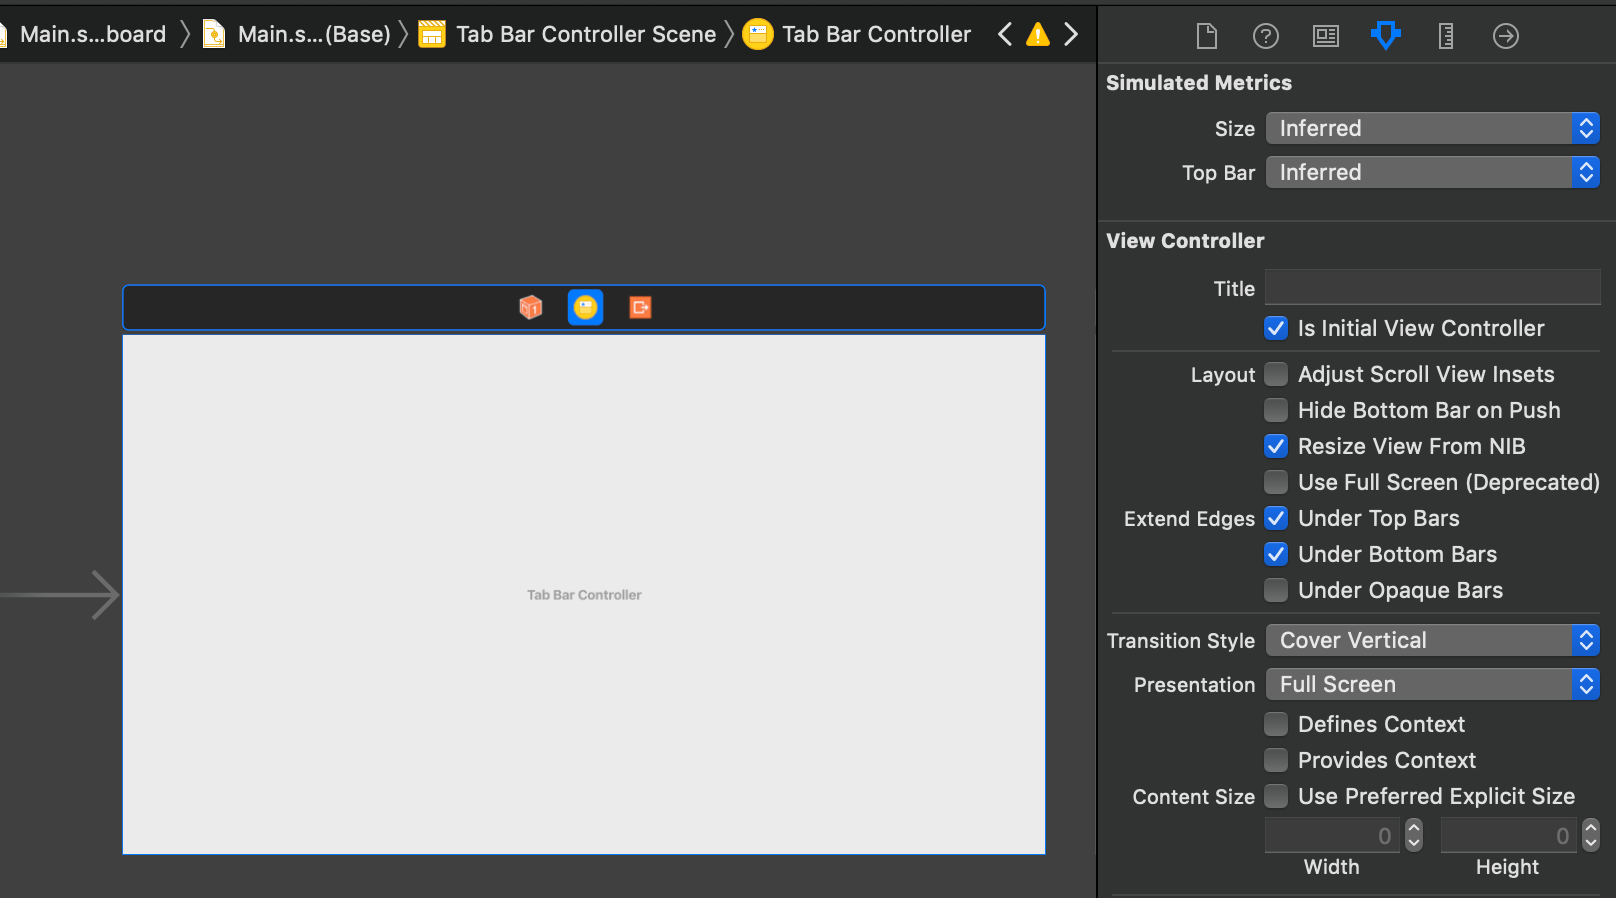
First, make sure to go to Main.storyboard to add a Tab Bar Controller. Then set it as initial view controller. This tab bar will become the the root view controller of the app’s window.
Next, navigate to AppDelegate.swift to add all the code below:
|
1 2 3 4 5 6 7 8 9 10 11 12 13 14 15 16 17 18 19 20 |
@UIApplicationMain class AppDelegate: UIResponder, UIApplicationDelegate { var window: UIWindow? func application(_ application: UIApplication, didFinishLaunchingWithOptions launchOptions: [UIApplication.LaunchOptionsKey: Any]?) -> Bool { let tabBarController = self.window!.rootViewController as! UITabBarController let endpoints: [Endpoint] = [.nowPlaying, .upcoming, .popular, .topRated] let viewControllers = endpoints.map { (endpoint) -> UIViewController in let movieVC = tabBarController.storyboard!.instantiateViewController(withIdentifier: "MovieListViewController") as! MovieListViewController movieVC.endpoint = endpoint movieVC.title = endpoint.description return movieVC } tabBarController.viewControllers = viewControllers return true } } |
Try to build and the run app to see all the glory of the movies being displayed in categories! When using Apple TV Simulator, you can navigate around using the arrow keys, press enter to ok, and esc if you need to access the menu button.
Building the Movie Search Screen
Next, we will add the search capabilty to our app, so the user can search a specific movie by title. To do this, we will instantiate the UISearchController with the MovieListViewController instance and set the seachController’s searchResultUpdater to MovieListViewController. Then, we instantiate UISearchContainerViewController passing the search controller and append it to the children view controllers of the tab bar.
|
1 2 3 4 5 6 7 8 9 10 11 12 13 14 15 16 17 18 19 |
// AppDelegate.swift @UIApplicationMain class AppDelegate: UIResponder, UIApplicationDelegate { ... func createSearch(storyboard: UIStoryboard?) -> UIViewController { guard let movieListController = storyboard?.instantiateViewController(withIdentifier: "MovieListViewController") as? MovieListViewController else { fatalError("Unable to instantiate a NewsController") } let searchController = UISearchController(searchResultsController: movieListController) searchController.searchResultsUpdater = movieListController let searchContainer = UISearchContainerViewController(searchController: searchController) searchContainer.title = "Search" return searchContainer } } |
Don’t forget to add viewControllers.append(createSearch(storyboard: tabBarController.storyboard)) before assigning the Tab Bar view controllers in applicationDidFinishLaunching.
Next, we need to add the implementation of UISearchResultUpdating protocol to MovieListViewController. Open the MovieListViewController.swift file and insert the following code at the end of the file:
|
1 2 3 4 5 6 7 8 9 10 11 12 13 14 15 16 17 18 19 20 21 22 23 24 25 26 |
extension MovieListViewController: UISearchResultsUpdating { func updateSearchResults(for searchController: UISearchController) { movies = [] guard let text = searchController.searchBar.text, !text.isEmpty else { return } activityIndicator.startAnimating() hideError() movieService.searchMovie(query: text, params: nil, successHandler: {[unowned self] (response) in self.activityIndicator.stopAnimating() if searchController.searchBar.text == text { self.movies = response.results } }) { [unowned self] (error) in self.activityIndicator.stopAnimating() self.showError(error.localizedDescription) } } } |
This delegate will be invoked everytime the search bar receives an input from the user as they type. Here, we check if the text is empty. If the text is empty, we clear the movies property. If the text is not empty, we invoked the MovieService movieService.searchMovie(query:) passing the success and error handler similiar to the fetchMovies method.
Try to build and run the app again! Navigate to the tab bar, you will find the search function as the last items. Try it out! And type the name of the movies you want to search using your keyboard!
Building the Movie Detail Screen
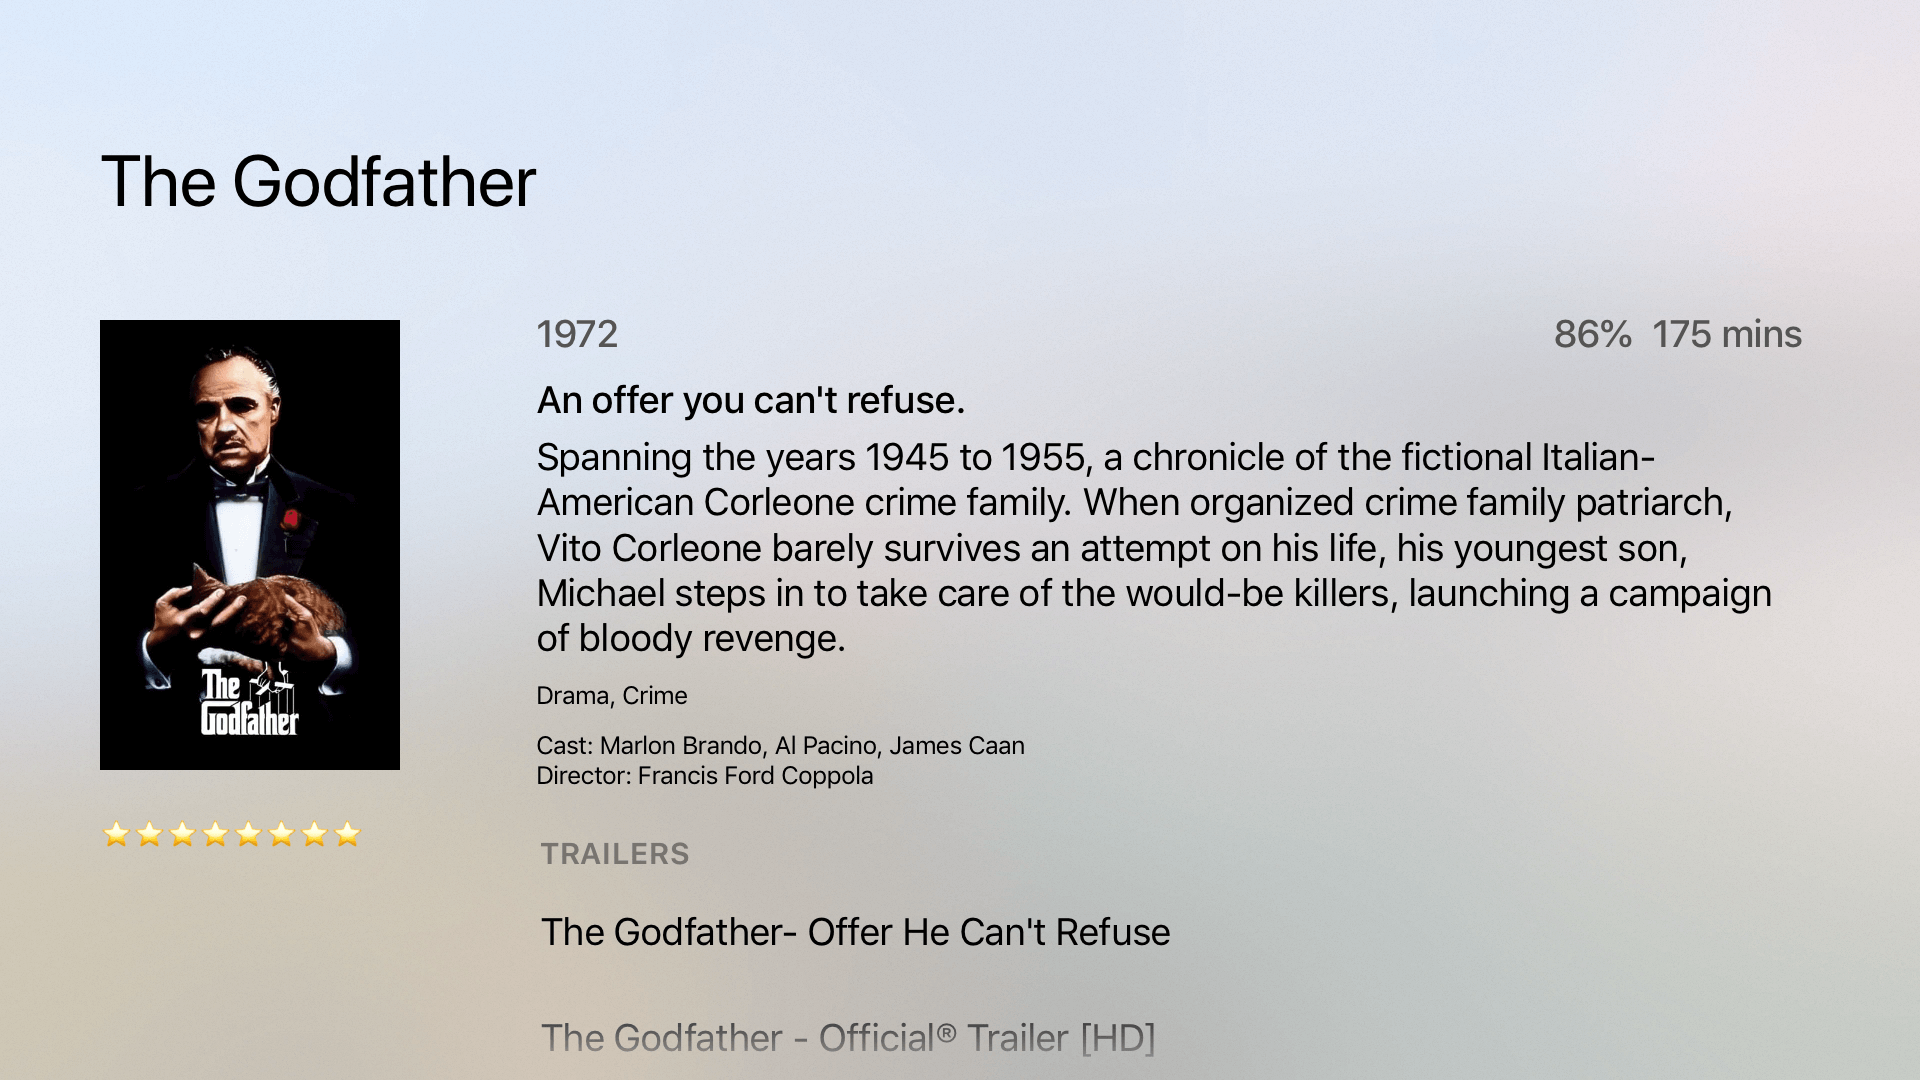
The Movie Detail Screen consists of several components, here they are:
Label– display the title of the movieImage View– display the poster image of the movie.Rating Label– display the rating star text of the movie.Table View– display list of movie metadata and trailers. It will use 2 kind of cells: one is for displaying the metadata of the movie and the other one is a standard cell for displaying the title of trailer.
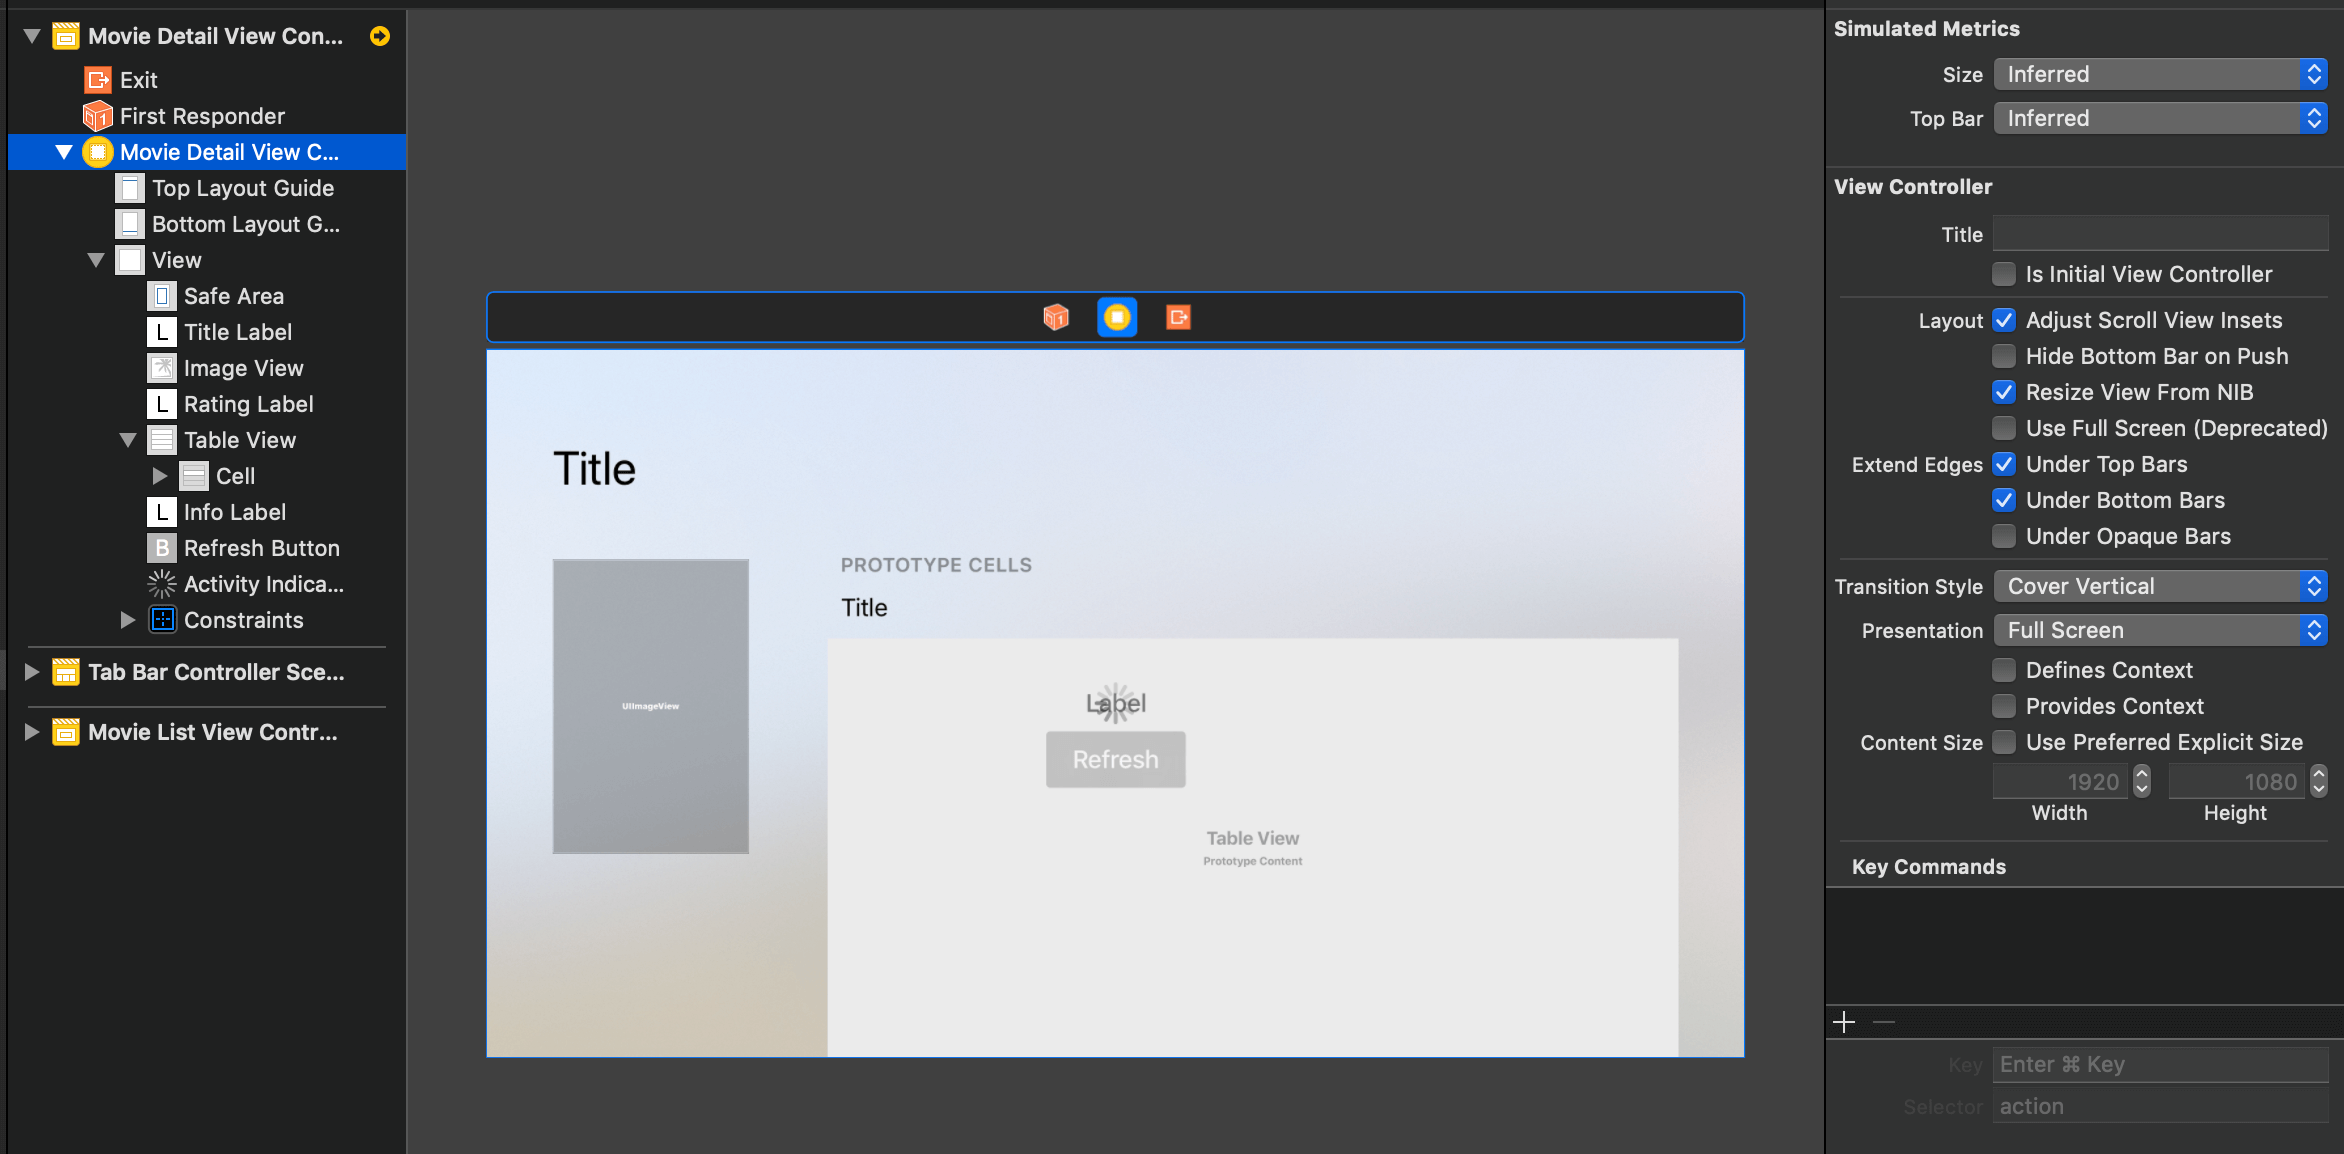
Let’s start by creating new File named MovieDetailViewController.swift. Inside the file, we declare the MovieDetailViewController class as a subclass of UIViewController. Next, let’s move on to Main.storyboard file and drag a View Controller from object library. Set the View Controller class and Storyboard ID as MovieDetailViewController in identity inspector. Let’s do several steps to layout the UI components:
- Drag a
Labeland set the frame toX = 100,Y = 80,width = 1720, andheight = 200. Also, set the font tosystem 72.0. - Drag an
Image View, then set the frame toX = 100,Y = 420,width = 300, andheight = 450. - Drag a
Table Viewand set the frame toX = 520,Y = 295,width = 1300, andheight = 785. Also, add 1 protoype cell. Set the style toBasic, identifier toCell, make sure thefocus styleis set todefault. Also make sure to set thedatasourceanddelegateof the table view to theMovieDetailViewController. - Drag an
Activity Indicator View. Set the Auto Layout constrainstAlign Center X to Superview,Align Center Y to Superview. Also in Attribute Inspector, set the style toLarge White, color toBlack Color, and check theHides when Stoppedcheckbox. - Drag an
UILabelto theView Controller. Set the Auto Layout constraintsAlign Center X to Superview,Align Center Y to Superview. - Drag an
UIButtonto theView Controller. Set the Auto Layout constraintsAlign Center X to Label,Vertical Top Space to Label = 20.
Open the MovieDetailViewController.swift file and declare several outlet properties.
|
1 2 3 4 5 6 7 8 9 10 11 12 13 14 15 16 17 18 19 20 21 22 23 24 25 26 27 28 |
import UIKit import Kingfisher import XCDYouTubeKit import AVKit class MovieDetailViewController: UIViewController { @IBOutlet var activityIndicator: UIActivityIndicatorView! @IBOutlet var imageView: UIImageView! @IBOutlet var titleLabel: UILabel! @IBOutlet var ratingLabel: UILabel! @IBOutlet var infoLabel: UILabel! @IBOutlet var refreshButton: UIButton! @IBOutlet var tableView: UITableView! override func viewDidLoad() { super.viewDidLoad() tableView.register(MovieDetailCell.nib, forCellReuseIdentifier: "DetailCell") tableView.rowHeight = UITableView.automaticDimension tableView.estimatedRowHeight = 100 } @IBAction func refreshTapped(_ sender: Any) { fetchMovieDetail() } } |
Then connect each one of them to the corresponding view in storyboard. Again, please make sure to connect the action method to the refresh button.
Implementing the MovieDetailCell
The MovieDetailCell is a subclass of Table View Cell. Because there is currently a bug in Xcode if you use a stack view for layout in the xib using tvOS as target. This is why I can’t provide step by step tutorial to layout this. But, basically it used Nested Stack View technique to layout all the labels in horizontal and vertical direction. You can see the layout hierarchy when the build target is iOS from the image below.
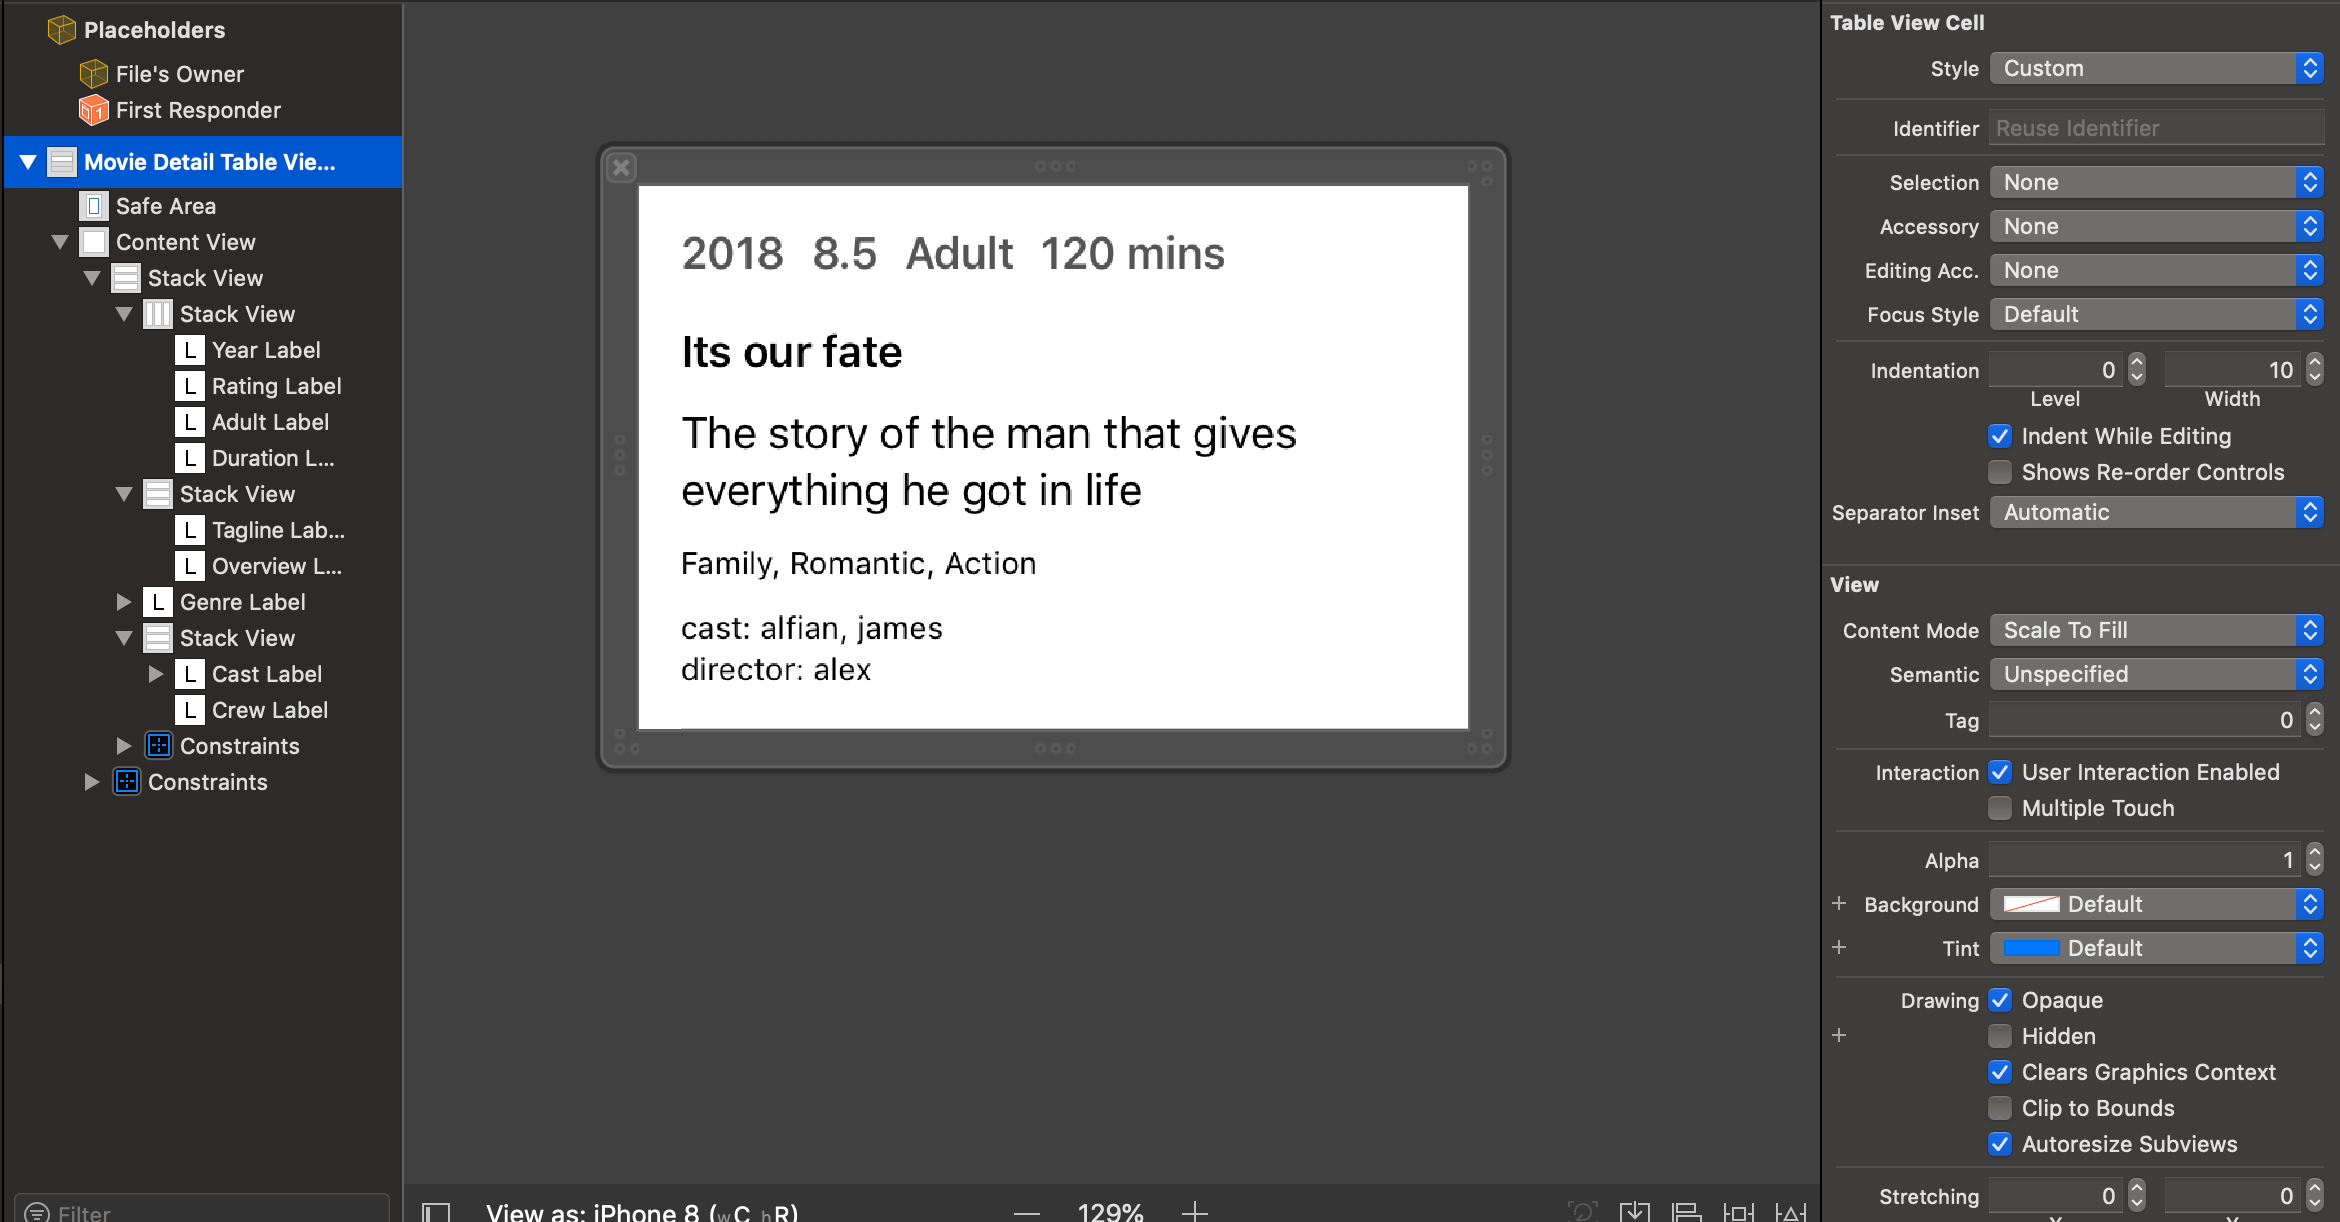
Inside the MovieDetailCell.swift, there is one Movie property that uses didSet property observer to configure the UI when the value is assigned to the property. You can see how the UI elements is being configured based on the property of the movie from the code below.
|
1 2 3 4 5 6 7 8 9 10 11 12 13 14 15 16 17 18 19 20 21 22 23 24 25 26 27 28 29 30 31 32 33 34 35 36 37 38 39 40 41 42 43 44 45 46 47 48 49 50 51 52 53 54 55 56 57 58 59 60 61 62 63 64 65 66 67 |
import UIKit class MovieDetailCell: UITableViewCell { @IBOutlet weak var taglineLabel: UILabel! @IBOutlet weak var overviewLabel: UILabel! @IBOutlet weak var yearLabel: UILabel! @IBOutlet weak var ratingLabel: UILabel! @IBOutlet weak var adultLabel: UILabel! @IBOutlet weak var durationLabel: UILabel! @IBOutlet weak var genreLabel: UILabel! @IBOutlet weak var castLabel: UILabel! @IBOutlet weak var crewLabel: UILabel! public static var nib: UINib { return UINib(nibName: "MovieDetailCell", bundle: Bundle(for: MovieDetailCell.self)) } public static let dateFormatter: DateFormatter = { let dateFormatter = DateFormatter() dateFormatter.dateFormat = "YYYY" return dateFormatter }() public var movie: Movie? { didSet { guard let movie = movie else { return } taglineLabel.text = movie.tagline overviewLabel.text = movie.overview yearLabel.text = MovieDetailCell.dateFormatter.string(from: movie.releaseDate) if movie.voteCount == 0 { ratingLabel.isHidden = true } else { ratingLabel.isHidden = false ratingLabel.text = movie.voteAveragePercentText } adultLabel.isHidden = !movie.adult durationLabel.text = "\(movie.runtime ?? 0) mins" if let genres = movie.genres, genres.count > 0 { genreLabel.isHidden = false genreLabel.text = genres.map { $0.name }.joined(separator: ", ") } else { genreLabel.isHidden = true } if let casts = movie.credits?.cast, casts.count > 0 { castLabel.isHidden = false castLabel.text = "Cast: \(casts.prefix(upTo: 3).map { $0.name }.joined(separator: ", "))" } else { castLabel.isHidden = true } if let director = movie.credits?.crew.first(where: {$0.job == "Director"}) { crewLabel.isHidden = false crewLabel.text = "Director: \(director.name)" } else { crewLabel.isHidden = true } } } } |
Building the Movie Detail View Controller
Next, let’s build the MovieDetailViewController to fetch movie detail from the TMDb API and display all the information and trailers. Open MovieDetailViewController.swift and insert the following code:
|
1 2 3 4 5 6 7 8 9 10 11 12 13 14 15 16 17 18 19 20 21 22 23 24 25 26 27 28 29 30 31 32 33 34 35 36 37 38 39 40 41 42 43 44 45 46 47 48 49 50 51 52 53 54 55 56 57 58 59 60 61 62 63 64 65 66 67 68 69 70 71 72 73 74 75 76 77 78 79 80 81 82 83 84 85 86 87 88 89 90 91 92 93 94 95 96 97 98 99 100 101 102 103 104 105 106 107 108 109 110 111 112 113 114 115 116 117 118 119 120 121 122 123 124 125 126 127 128 129 130 131 132 133 134 135 136 137 138 139 140 141 142 143 144 145 146 147 148 149 150 151 152 153 154 |
import UIKit import Kingfisher import XCDYouTubeKit import AVKit class MovieDetailViewController: UIViewController { @IBOutlet var activityIndicator: UIActivityIndicatorView! @IBOutlet var imageView: UIImageView! @IBOutlet var titleLabel: UILabel! @IBOutlet var ratingLabel: UILabel! @IBOutlet var infoLabel: UILabel! @IBOutlet var refreshButton: UIButton! @IBOutlet var tableView: UITableView! var movieService: MovieService = MovieStore.shared var movieId: Int! private var movie: Movie! { didSet { updateMovieDetail() } } override func viewDidLoad() { super.viewDidLoad() tableView.register(MovieDetailCell.nib, forCellReuseIdentifier: "DetailCell") tableView.rowHeight = UITableView.automaticDimension tableView.estimatedRowHeight = 100 fetchMovieDetail() } private func fetchMovieDetail() { guard let movieId = movieId else { return } activityIndicator.startAnimating() hideError() movieService.fetchMovie(id: movieId, successHandler: {[weak self] (movie) in self?.activityIndicator.stopAnimating() self?.movie = movie }) { [weak self] (error) in self?.activityIndicator.stopAnimating() self?.showError(error.localizedDescription) } } private func updateMovieDetail() { guard let movie = movie else { return } titleLabel.text = movie.title ratingLabel.text = movie.ratingText imageView.kf.indicatorType = .activity imageView.kf.setImage(with: movie.posterURL) tableView.reloadData() } private func showError(_ error: String) { infoLabel.text = error infoLabel.isHidden = false refreshButton.isHidden = false } private func hideError() { infoLabel.isHidden = true refreshButton.isHidden = true } @IBAction func refreshTapped(_ sender: Any) { fetchMovieDetail() } } extension MovieDetailViewController: UITableViewDataSource, UITableViewDelegate { func numberOfSections(in tableView: UITableView) -> Int { return movie == nil ? 0 : 2 } func tableView(_ tableView: UITableView, numberOfRowsInSection section: Int) -> Int { if section == 0 { return 1 } else { return movie?.videos?.results.count ?? 0 } } func tableView(_ tableView: UITableView, cellForRowAt indexPath: IndexPath) -> UITableViewCell { if indexPath.section == 0 { let cell = tableView.dequeueReusableCell(withIdentifier: "DetailCell", for: indexPath) as! MovieDetailCell cell.movie = movie return cell } else { let cell = tableView.dequeueReusableCell(withIdentifier: "Cell", for: indexPath) let video = (movie?.videos?.results ?? [])[indexPath.row] cell.textLabel?.text = video.name return cell } } func tableView(_ tableView: UITableView, didSelectRowAt indexPath: IndexPath) { if indexPath.section == 1 { let video = (movie?.videos?.results ?? [])[indexPath.row] let playerVC = AVPlayerViewController() present(playerVC, animated: true, completion: nil) XCDYouTubeClient.default().getVideoWithIdentifier(video.key) {[weak self, weak playerVC] (video, error) in if let _ = error { self?.dismiss(animated: true, completion: nil) return } guard let video = video else { self?.dismiss(animated: true, completion: nil) return } let streamURL: URL if let url = video.streamURLs[XCDYouTubeVideoQuality.HD720.rawValue] { streamURL = url } else if let url = video.streamURLs[XCDYouTubeVideoQuality.medium360.rawValue] { streamURL = url } else if let url = video.streamURLs[XCDYouTubeVideoQuality.small240.rawValue] { streamURL = url } else if let urlDict = video.streamURLs.first { streamURL = urlDict.value } else { self?.dismiss(animated: true, completion: nil) return } playerVC?.player = AVPlayer(url: streamURL) playerVC?.player?.play() } } } func tableView(_ tableView: UITableView, titleForHeaderInSection section: Int) -> String? { if section == 1 { return "Trailers" } return nil } } |
That’s a lot of code. But let me go through it in details:
- The
movieIdproperty is a integer that will be assigned using dependency injection, this will be passed to theMovieServiceto request detail of a movie from the TMDb API for specific id. - The
movieServiceis an instance ofMovieStorethat will be used to fetch a movie based on themovieId. - The
viewDidLoadmethod registers theMovieDetailCellxib with areuseIdentifer. It also configures the table view to use dynamic height for its rows. At last, it invokes thefetchMovieDetailmethod to fetch the movie details. - The
fetchMovieDetailmethod starts animating the activity spinner, hide all ui elements related to error if existst. Then it calls thefetchMovies(from:). In the success handler, the response result which is the movie is assigned to themovieinstance property in the View Controller that triggers the update of UI. In the error handler, it will invoke theshowErrormethod passing the errorlocalizedDescriptionproperty to display an error message and refresh button. Both of the handlers will stop animating the activity spinner. - The
updateMovieDetailmethod update thetitleLabel,poster imageand,rating textwith the property of the movie. At last, it reloads the table’s data. - In
numberOfSections(in tableView:)method, we return 0 if the movie isnil. Otherwise, we return 2. The first section will display the metadata of the movie, while the other one will display the trailer of the movie. - In
tableView(_:, numberOfRowsInSection section:), for the first section we return 1 as the number of rows, while for the second section we return the number of videos inside the movie. - In
tableView(_:, cellForRowAt indexPath:), for the firs section, we dequeque theMovieDetailCelland assign the movie to the cell’s movie property to configure the UI. While for the second section, we retrieve the video using the indexPath row from the movie videos array, then dequeque the default basic cell and set it’stextLabeltext property with the name of the video. - At last to play the trailer when user tap on the row. Inside the
tableView(_:, didSelectRowAt indexPath:), we check to make sure the row being tapped by the user is from the trailer section. In here, we use theXCDYoutubeClientto retrieve the YouTube videourlspassing the video key. When it succesfully retrieve the videourls, we instantiateAVPlayerpassing the streamurland present it using theAVPlayerViewControllerto play it in full screen.
At last, you need to add some code inside the MovieListViewController that trigger the navigation to Movie Detail Screen when user select a movie from the cell.
|
1 2 3 4 5 6 7 8 9 10 11 12 |
extension MovieListViewController: UICollectionViewDataSource, UICollectionViewDelegateFlowLayout { ... func collectionView(_ collectionView: UICollectionView, didSelectItemAt indexPath: IndexPath) { let movieDetailVC = storyboard!.instantiateViewController(withIdentifier: "MovieDetailViewController") as! MovieDetailViewController movieDetailVC.movieId = movies[indexPath.item].id present(movieDetailVC, animated: true, completion: nil) } } |
Try to build and run the project. Select a movie and press enter to navigate to detail screen, Here you can navigate using arrow keys to the trailers and press enter to watch the trailer that you want to watch!.
Conclusion
That’s it folks! We have finally built our Movie Database tvOS app that displays movies in beautiful grids. It is pretty easy to navigate between categories using the Siri Remote. It also provides users with the movie details and let them watch the movie trailers. The search is also super helpful when we want to search for a specific movie that the user loves. Building tvOS app using TVUIKit is pretty similiar with building iOS app with UIKit. We can share the same code from the iOS codebase (especially for the model and networking layers) to build a tvOS app. Let’s keep the lifelong learning goes on! And, build insanely great products that impact our world!.
For reference, you can refer to the completed project on the GitHub Repository.

Mobile, Web, a bit of backend Software Developer and Lifelong Learner. Currently building super app @ Go-Jek.